Starting with version 0.8.3 of the WP-Members Memberships for WooCommerce extension, you can apply different expiration periods for variable memberships.
1. Create membership
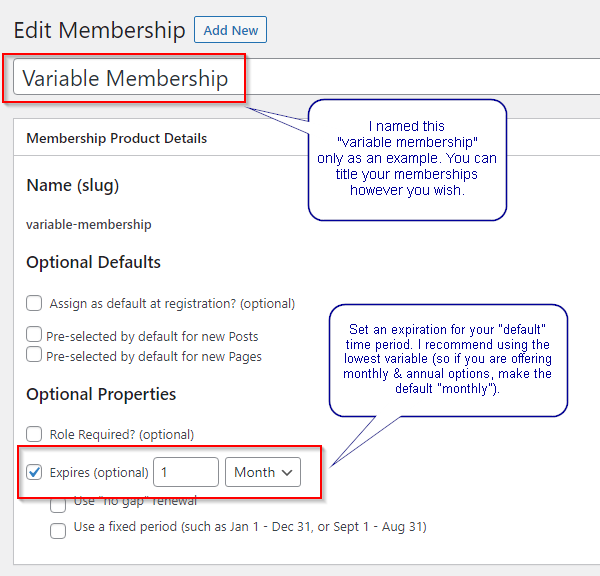
Begin with a membership that is created in WP-Members. In this example, the membership will be named “Variable Membership”, but you can call it whatever you wish.
When setting the expiration period for the membership, I recommend setting it to the lowest time period that will be avialable. In our example, we will offer monthly and annual membership. The lowest time period is monthly so we will set that in the membership properties as the default.
2. Create the product in WooCommerce
After the membership is created, you will need to create a product in WooCommerce to link the membership and sell it. You can title this and add a description however you wish. The example will focus on the Product data section for a variable product.
3. Set attributes for a variable product
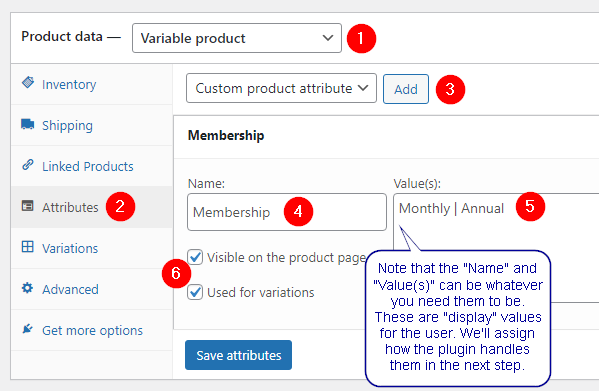
- Since this is an example that will offer multiple (variable) time periods, we will create this as a variable product.
- Select the attributes for the product.
- In the Attributes section, click to add a custom product attribute.
- Name your attribute. In this example, we’ll call this “Membership”. This value displays to the user in the product view, so consider that it is “user facing” data when choosing a name.
- Create the values for your variations. As already noted, we are creating a monthly and annual option for our membership. Again, these values are “user facing” so create them accordingly. Separate values using the “pipe” character.
- Lastly, select the checkboxes to make the attributes visible on the product page and that they will be used in variations.
4. Create the variations
Now that you have the attributes created, it’s time to create the variations.
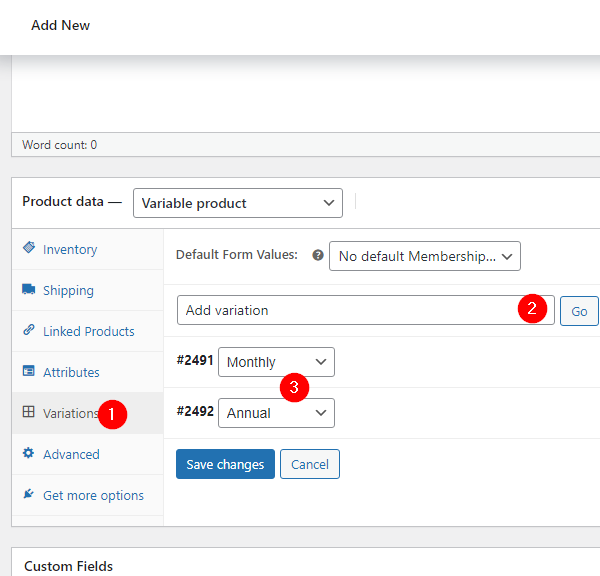
- Select the “variations” tab in product data.
- Add variations by selecting “Add variation” and clicking “Go”. Our example has two variations, so do this twice if following the example, otherwise add the number of variations you are adding (based on your available attributes you created in the previous step).
- Select an attribute for the variation. The selector will include the values from the attributes you created in the step above. If following the example, select “monthly” and “annual” for the two variations.
5. Define properties for variations (the default expiration)
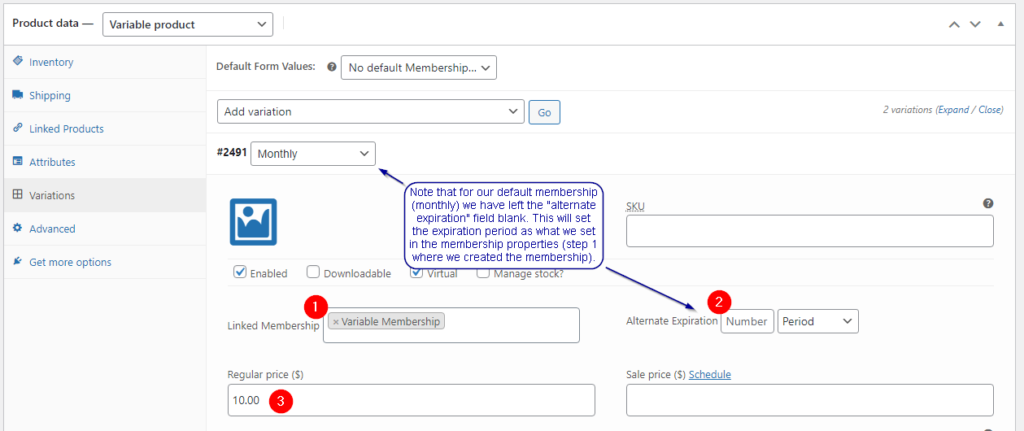
Now you can open the variations and set their properties. For our example, the first is “Monthly”.
- Link the membership (remember the “variable membership” we created in the first step – select it from the list to assign it to this variation).
- Remember when we set up the membership, we created it with a default expiration of monthly. So for the monthly variation, we do not need to apply an alternate expiration period. Leave the alternate expiration section blank and when this variation is purchased, it will set the default expiration assigned to the membership.
- Give the product a price or it will not show as an available variation in the product view.
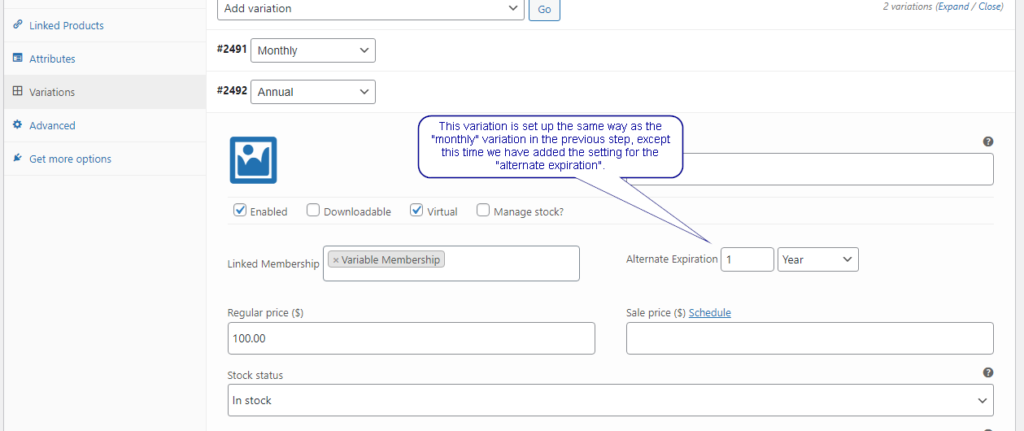
6. Define properties for variations (the alternate expiration)
The second variation (and any others you might create) are the same as the “default” we set properties for in the step above, with the difference being that we define an alternate expiration period.
In this example, we set that to 1 year, and when this variation is purchased, the user’s expiration period will automatically be set to 1 year rather than the default for the membership (1 month in this example).
Don’t forget to set a price for the variation or it will not show up in the selector for the user.
